Replacement Procedure
The following procedure can be used to replace the desiccant on all of Pyramid's ion chamber products that feature user-serviceable replacement.
Tools required:
- 2.5mm Allen Wrench
- PH1 Phillips Head Screwdriver
Preparing the Ion Chamber
Disconnect and dismount the ion chamber from the beamline and carefully place it connector-side down on a clean, soft surface.
Cover the windows with protective paper or cardboard to prevent unintentionally puncturing them.
Prepare the Replacement Parts
Locate the desiccant replacement package. Ensure the contents have not expired by observing the date on the label, once the package has been opened, observe the humidity indicator card inside.
Do not open the bag until you are ready to place the new desiccant in the ion chamber.
Remove the Desiccant Port Cover
To replace the desiccant, you must first remove the ion chamber's desiccant port cover, which contains all of the desiccant packets.
Locate the desiccant port cover on the side of the ionization chamber body. In most cases it will be annotated on the decal.
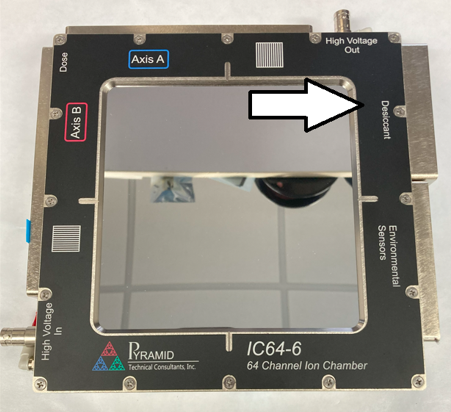
The desiccant is located inside the desiccant port cover. Remove the cover using a 2.5 mm Allen wrench. Start by slightly loosening each screw in a rotary pattern, then keep working around the pattern until the screws are loose. Remove all the screws and place them somewhere safe.
Carefully remove the cover. Place it on the table with the desiccant cavity facing upwards. If you are replacing the entire cover unit, remove it from its packaging and skip to installing the cover instructions.
Replacing the Desiccant in the Cover
Remove the cover mesh, retaining the screws and lock washers.
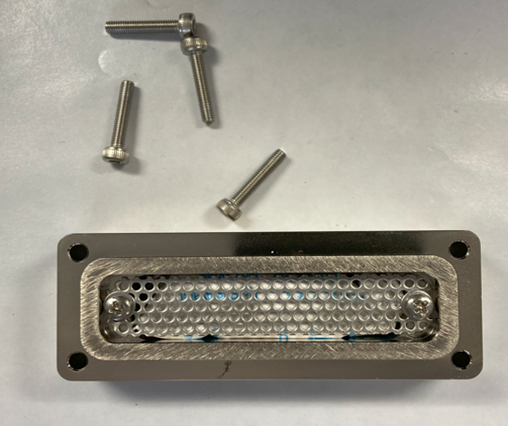
Remove the old desiccant packets and discard them. Open the sealed replacement bag and place the new packets in the panel. Make sure that the packets are clear of the mounting surface and replace the cover mesh. Replace the screws and lock washers, tightening securely.
Wipe the “O”-ring and “O”-ring mating surface with a clean lintless wipe. This will ensure a good seal on the chamber.
Reinstall the Desiccant Cover
Place the cover back on the IC, the cover is symmetric and can be oriented in either direction.
Replace the mounting screws, and lightly tighten. In a rotary pattern, gradually tighten the screws until secure.
Reinstall the Ion Chamber
Mount the ion chamber back in its position in the beamline and reconnect all the corresponding cables.
Monitor environmental conditions and do not run the beam or turn on high voltage until internal humidity is below 10%. Permanent damage may occur